How to Build an API using Django REST Framework with Ease #1
A beginner's guide to understanding and making RESTful APIs.


This article is part of a series that is focused on helping beginners master the Django Rest framework and become efficient at writing REST APIs.
Prerequisite: This article is beginner-friendly, and to understand it well, you should have:
basic understanding of Django, its views, models, and forms
understanding of the basics of HTTP (HyperText Transfer Protocol) and request methods, etc
have
pipinstalledAny of Python (3.6, 3.7, 3.8, 3.9, 3.10) and Django (2.2, 3.0, 3.1, 3.2, 4.0, 4.1) versions installed on your computer
an integrated development environment (IDE) editor like VS Code, Sublime Text, etc
Introduction
An application programming interface (API) is a set of requirements, protocols, and resources that enable interaction between various software systems. They aid in the communication between two or more software applications, allowing developers to integrate various services, libraries, or software systems seamlessly. REST is an API example. It enables the safe transaction of data between computer systems, web infrastructures, or software applications. In this article, you will learn how to build a simple REST API with the Django Rest Framework (DRF). You will not learn about class-based views in this article.
What is the Django Rest Framework (DRF)?
The Django Rest Framework is a popular Python web framework. It provides developers with a lot of powerful libraries and tools that make the facilitation and development of RESTful APIs easy, allowing programmers to design and construct fast and effective APIs. Why should you use the Django Rest Framework (DRF)?
Rapid development process: it has in-built views, serializers, and authentication classes, therefore reducing the need to write a lot of code when creating an API. These give room for time efficiency during programming and eliminate repetition.
Documentation and community: DRF has extensive documentation, properties, libraries, and tools that help developers with a thorough understanding and navigation of the framework. It also has a very large community compared to some backend frameworks.
Serialization and serialization validation: serialization is simplified and comprehensible, thereby making data conversion into
JSON(javascript object notation) and vice versa simple. DRF provides automatic validation for approved data and automatic rejection for unapproved data.Permissions and authentication: Thanks to the range of authentication methods and built-in permission classes DRF offers, securing your API becomes easier. Access can be limited to specific views and activities based on user responsibilities and permissions.
Viewsets and URL Routing: DRF provides powerful URL routing and view classes that map HTTP methods to CRUD (create, read, update, delete) operations on resources automatically.
Testing: With DRF, writing unit tests and integration tests for your API endpoints is now simpler.
There are a lot of advantages to using the Django Rest framework to build APIs, you will learn about some of them in this article and other parts of the series.
Setting up the Django rest framework
To install the Django Rest framework, if you have pip installed, activate your virtual environment, and paste this into your terminal with no space in between djangorestframwework .
$ pip install djangorestframework
or clone from GitHub.
$ git clone https://github.com/encode/django-rest-framework
After installation or if you have it previously installed, you can check with
$ pip show djangorestframework
The output should be something like this:
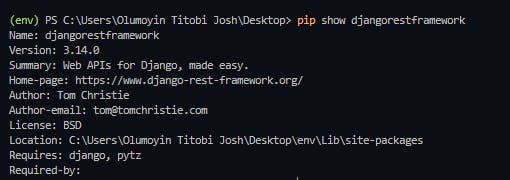
If you're having problems getting an output like that, try activating your virtual environment before trying again.
Now let's build an API!
Creating a simple API that gets and receives user data
Start with these steps:
Open up your terminal and create a new Django Rest project named
userData_api.django-admin startproject userData_apiIn your terminal navigate to the
userData_apidirectory and create a Django app namedbase.💡Don't bother much about thebasefolder, it will be used when creating custom models.python manage.py startapp baseOpen the folder
userData_apiin your editor, and navigate to thesettings.pyfile.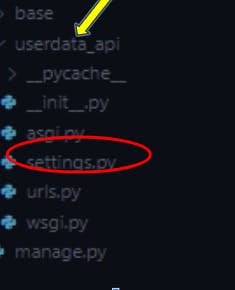
Add
'rest_framework'andbaseto the list ofINSTALLED_APPSinsidesetting.py.
INSTALLED_APPS = [
    ##other installed apps
    ...
    'base',
    'rest_framework'
]
- Create a folder named
apiinside the root directory, and make these three files inside theapifolder, the__init__.py,views.py,urls.py.

Include the
api.urlsto the list of URLs in theuserData_apidirectory.from django.contrib import admin from django.urls import path, include urlpatterns = [ path('admin/', admin.site.urls), #add the urls path from the api directory path('',include('api.urls')) ]
Creating API views and URLs
After setting up the Django Rest framework, it's time to start writing some code.
The view.py file
The type of view that will be used in this article is the function-based view. Class-based views and generic-based views will be explored later in the series. Writing function-based views for DRF is a little different from writing function-based views in Django.
paste these in the view.py file in the api folder:
from rest_framework.response import Response
from rest_framework.decorators import api_view

#only the GET request is permitted for this view
@api_view(['GET'])
def displayUser(request):
    context={'name':'Anonymous', 'email':'anonymous@email.com'}
    return Response(context)
In the view.py file, the imported Response class handles HTTP responses, while the @api_view is a decorator that takes in a list of permitted HTTP requests for a view function. The displayUser function simply returns a dictionary filled with user data.
The urls.py file
Put this in urls.py inside the api folder:
from django.urls import path
from . import views
#url to the displayUser view
urlpatterns=[
    path('',views.displayUser)
]
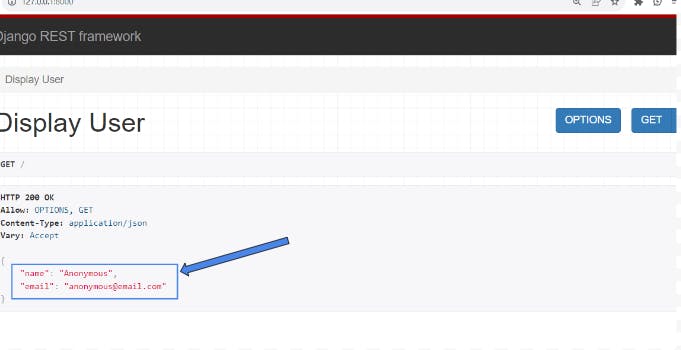
Run the server in your terminal with python manage.py runserver and check port:http//127.0.0.1:8000 in your browser. You should see the content's data displayed.
Serializers
Serializers are an essential factor in making Django rest APIs because serializers convert compound Django models and querysets to formats that can be used on the client side. Such formats are Javascript Object Notation (JSON )or Extensible Markup Language (XML). Deserialization is the opposite of serialization, deserialization converts the client-side data formats back to compound or complex types.
Why do we need a serializer? It's obvious from the above paragraph why we need serializers. Also Response can't read complex Python datatypes.
To create a serializer:
Create a serializer.py file inside your api folder, and put these inside:
#import serializer from rest framework
from rest_framework import serializers
from django.contrib.auth.models import User

class UserSerializer(serializers.ModelSerializer):
    class Meta:
#pass the User class as the model
        model = User
        fields = ['id', 'username', 'email']
Let's work through the serializer file. After importing the serializers from rest_framework, you can import a custom user model. But for this article, import the built-in User model from Django. The next step is creating a serializer class named UserSerializer that inherits from the ModelSerializer class. The serializer class's structure is similar to the structure used in creating a form in Django.
The
Meta.modelproperty in a serializer specifies the model that the serializer is designed to work with.
Make these changes to your view.py file:
from rest_framework.response import Response
from rest_framework.decorators import api_view
from django.contrib.auth.models import User
from .serializers import UserSerializer

@api_view(['POST'])
def registerUser(request):

    serializer = UserSerializer(data=request.data)
    if serializer.is_valid():
        serializer.save()
    return Response(serializer.data)

@api_view(['GET'])
def displayUser(request):

    users = User.objects.all()
    serializer = UserSerializer(users, many=True)
    return Response(serializer.data)


@api_view(['GET'])
def getAUser(request,pk):

    user = User.objects.get(id=pk)
    serializer = UserSerializer(user)
    return Response(serializer.data)
In the views.py file, import the serializer class UserSerializer , @api_view decorator and the built-in User model for the UserSerializer class.
Let's go over each view function:
The
registerUserview function takes in a request's data and serializes it, if the data is valid then it saves it.The
displayUsersview function simply gets all theUser, serializes, and renders them.The
getAUsersview function gets a user according to theirid.
Update your Urls.py to:
from django.urls import path
from . import views

urlpatterns=[
    path('',views.displayUser),
    path('register/',views.registerUser),
    path('<str:pk>',views.getAUser)
]
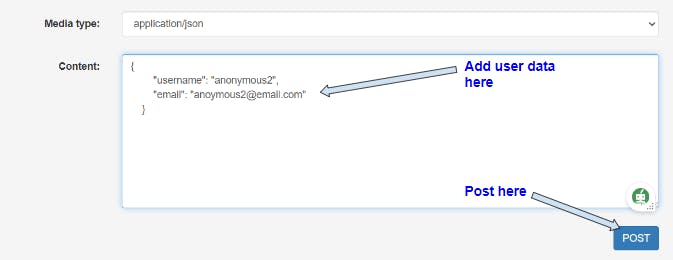
Run the server and you should be able to navigate the URLs.You can add user data at the http//127.0.0.1:8000/register/ URL and post it to the database.
after registering about two users to the database, you can get the list of all users in http//127.0.0.1:8000/ or get any specific user with their id. For example, to get the second user on the list add '2' to the above URL like http//127.0.0.1:8000/2

All the URLs are called endpoints. The client-side developer can now use this set of endpoints to manipulate and get user data at the front-end of the application.
Note that when using a serializer, you should only pass datatypes with properties that are registered to the Meta.model property of that serializer. If you have multiple models, then you should make a serializer for each of them.
Conclusion
You've learned how to serialize complex data types and build a simple REST API in this article. In the next, you will learn how to use class-based views and their advantages over function-based views. You will also learn about using custom models with serializers.